
With aimlflow, MLflow users can now seamlessly view and explore their MLflow experiments using Aim’s powerful features, leading to deeper understanding and more effective decision-making.
We have created a dedicated post on the setup of aimlflow on local environment. For further information and guidance, please refer to the following link:
Running Aim on the local environment is pretty similar to running it on the remote. See the guide on running multiple trainings using Airflow and exploring results through the UI here: https://medium.com/aimstack/exploring-mlflow-experiments-with-a-powerful-ui-238fa2acf89e
In this tutorial, we will showcase the steps required to successfully use aimlflow to track experiments on a remote server.
Project overview
We will use PyTorch and Ray Tune to train a simple convolutional neural network (CNN) on the Cifar10 dataset. We will be experimenting with different sizes for the last layers of the network and varying the learning rate to observe the impact on network performance.
We will use PyTorch to construct and train the network, leverage Ray Tune to fine-tune the hyperparameters, and utilize MLflow to meticulously log the training metrics throughout the process.
Find the full project code on GitHub: https://github.com/aimhubio/aimlflow/tree/main/examples/hparam-tuning

Server-side/Remote Configuration
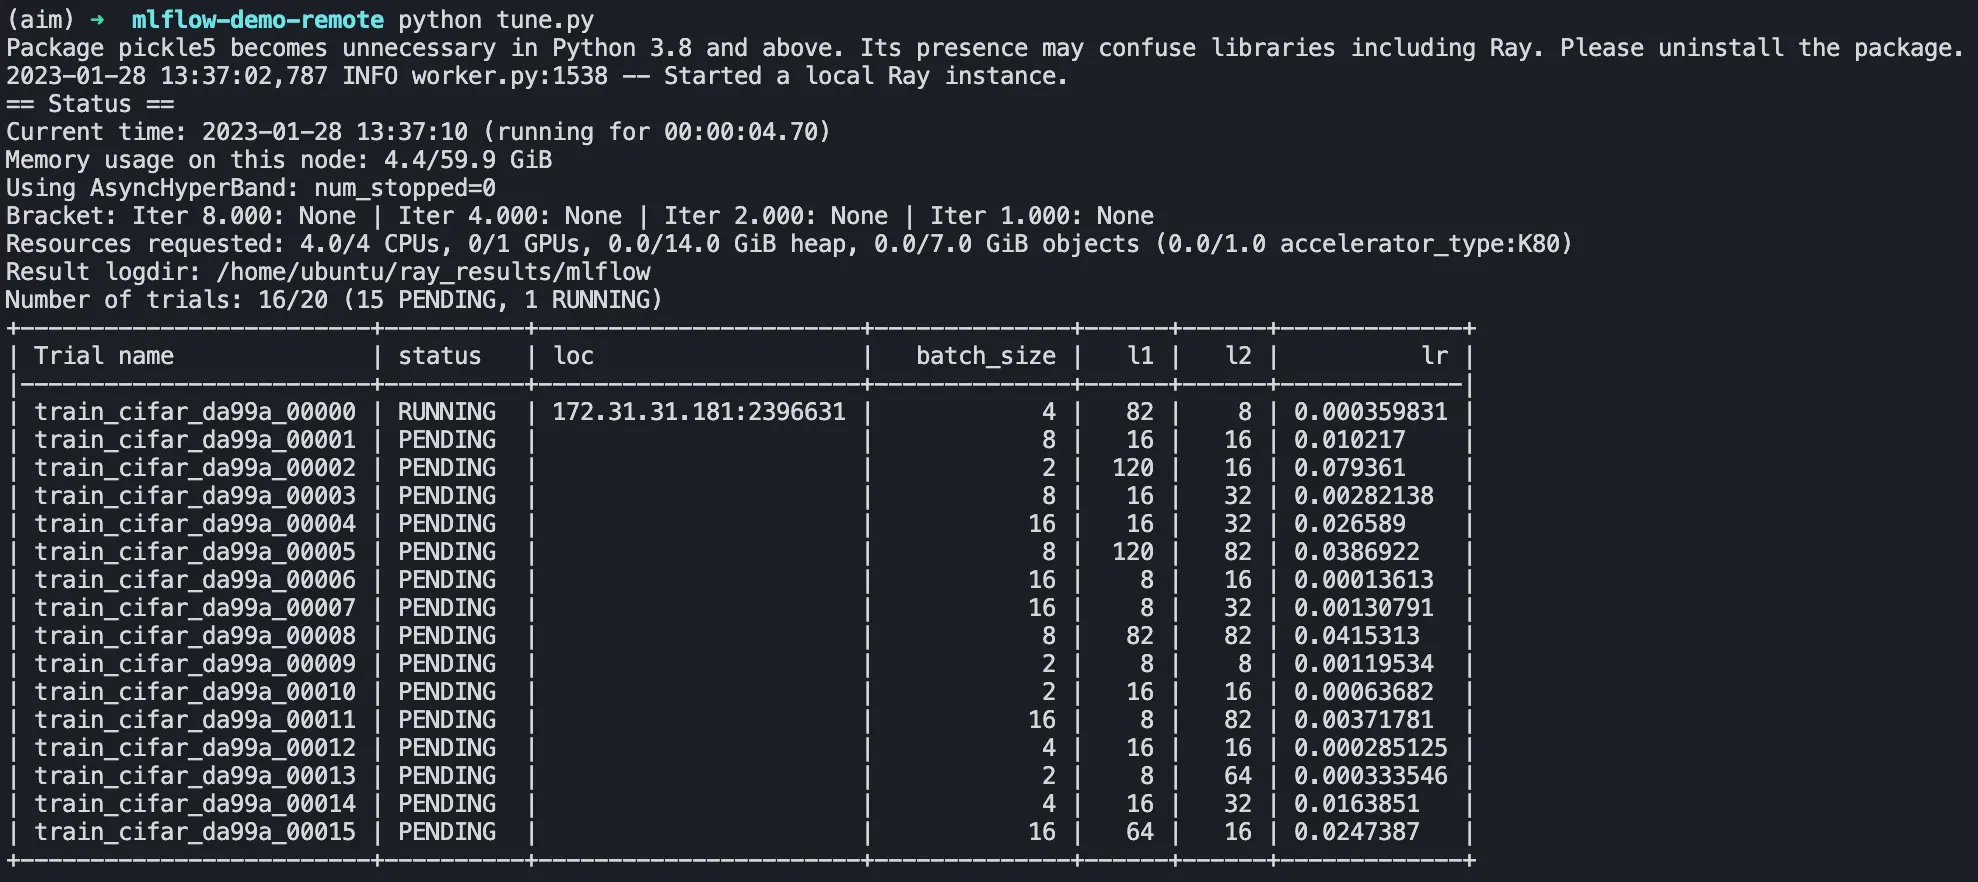
Let’s create a separate directory for the demo and name it mlflow-demo-remote. After which download and run the tune.py python script from the Github repo to conduct the training sessions:
$ python tune.pyRay Tune will start multiple trials of trainings with different combinations of the hyperparameters, and yield a similar output on the terminal:
Once started, mlflow will commence recording the results in the mlruns directory. Our remote directory will have the following structure:
mlflow-demo-remote
├── tune.py
└── mlruns
    ├── ...
Let’s open up the mlfow UI to explore the runs. To launch the mlflow user interface, we simply need to execute the following command from the mlflow-demo-remote directory:
$ mlflow ui --host 0.0.0.0By default, the --host is set to 127.0.0.1, limiting access to the service to the local machine only. To expose it to external machines, set the host to 0.0.0.0.
By default, the system listens on port 5000.
One can set --backend-store-uri param to specify the URI from which the source will be red, wether its an SQLAlchemy-compatible database connection or a local filesystem URI, by default its the path of mlruns directory.
Upon navigating to http://127.0.0.1:5000, you will be presented with a page that looks similar to this:

Synchronising MLflow Runs with Aim
After successfully initiating our training on the remote server and hosting the user interface, we can begin converting mlflow runs from the remote to our local Aim repository.
First, let’s move forward with the installation process of aimlflow. It’s incredibly easy to set up on your device, just execute the following command:
$ pip install aim-mlflowAfter successfully installing aimlflow on your machine let’s create a directory named mlflow-demo-local where the .aimrepository will be initialized and navigate to it. Then, initialize an empty aim repository by executing the following simple command:
$ aim initThis will establish an Aim repository in the present directory and it will be named .aim.
This is how our local system directory will look like:
mlflow-demo-local
└── .aim
    ├── ...
In order to navigate and explore MLflow runs using Aim, the aimlflow synchroniser must be run. This will convert and store all metrics, tags, configurations, artifacts, and experiment descriptions from the remote into the .aim repository.
To begin the process of converting MLflow experiments from the the hosted url YOUR_REMOTE_IP:5000 into the Aim repository .aim, execute the following command from our local mlflow-demo-local directory:
$ aimlflow sync --mlflow-tracking-uri='http://YOUR_REMOTE_IP:5000' --aim-repo=.aimThe converter will go through all experiments within the project and create a unique Aim run for each experiment with corresponding hyperparameters, tracked metrics and the logged artifacts. This command will periodically check for updates from the remote server every 10 seconds, and keep the data syncronized between the remote and the local databases.
This means that you can run your training script on your remote server without any changes, and at the same time, you can view the real-time logs on the visually appealing UI of Aim on your local machine. How great is that? ☺️
Now that we have initialized the Aim repository and have logged some parameters, we simply need to run the following command:
$ aim upto open the user interface and explore our metrics and other information.
For further reading please referee to Aim documentation where you will learn more about the superpowers of Aim.
Conclusion
To sum up, Aim brings a revolutionary level of open-source experiment tracking to the table and aimlflow makes it easily accessible for MLflow users with minimal effort. The added capabilities of Aim allow for a deeper exploration of remote runs, making it a valuable addition to any MLflow setup.
In this guide, we demonstrated how the MLflow remote runs can be explored and analyzed using the Aim. While both tools share some basic functionalities, the Aim UI provides a more in-depth exploration of the runs.
The added value of Aim makes installing aimlflow and enabling the additional capability well worth it.
Learn more
If you have any questions join Aim community, share your feedback, open issues for new features and bugs. 🙌
Show some love by dropping a ⭐️ on GitHub, if you think Aim is useful.